Getting Started with GTK [src]
GTK is a widget toolkit.
Each user interface created by GTK consists of widgets. This is implemented
in C using GObject, an object-oriented framework for C. Widgets
are organized in a hierarchy. The window widget is the main container.
The user interface is then built by adding buttons, drop-down menus, input
fields, and other widgets to the window. If you are creating complex user
interfaces it is recommended to use GtkBuilder and its GTK-specific markup
description language, instead of assembling the interface manually.
GTK is event-driven. The toolkit listens for events such as a click on a button, and passes the event to your application.
This chapter contains some tutorial information to get you started with GTK programming. It assumes that you have GTK, its dependencies and a C compiler installed and ready to use. If you need to build GTK itself first, refer to the Compiling the GTK libraries section in this reference.
Basics
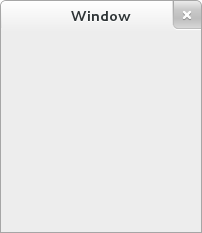
To begin our introduction to GTK, we’ll start with a very simple application. This program will create an empty 200 × 200 pixel window.
Create a new file with the following content named example-0.c.
#include <gtk/gtk.h>

static void
activate (GtkApplication *app,
          gpointer        user_data)
{
  GtkWidget *window;

  window = gtk_application_window_new (app);
  gtk_window_set_title (GTK_WINDOW (window), "Window");
  gtk_window_set_default_size (GTK_WINDOW (window), 200, 200);
  gtk_window_present (GTK_WINDOW (window));
}

int
main (int    argc,
      char **argv)
{
  GtkApplication *app;
  int status;

  app = gtk_application_new ("org.gtk.example", G_APPLICATION_DEFAULT_FLAGS);
  g_signal_connect (app, "activate", G_CALLBACK (activate), NULL);
  status = g_application_run (G_APPLICATION (app), argc, argv);
  g_object_unref (app);

  return status;
}
You can compile the program above with GCC using:
gcc $( pkg-config --cflags gtk4 ) -o example-0 example-0.c $( pkg-config --libs gtk4 )
For more information on how to compile a GTK application, please refer to the Compiling GTK Applications section in this reference.
All GTK applications will, of course, include gtk/gtk.h, which declares
functions, types and macros required by GTK applications.
Even if GTK installs multiple header files, only the top-level gtk/gtk.h
header can be directly included by third-party code. The compiler will abort
with an error if any other GTK header is directly included.
In a GTK application, the purpose of the main() function is to create a
GtkApplication object and run it. In this example a GtkApplication
pointer named app is declared and then initialized using gtk_application_new().
When creating a GtkApplication, you need to pick an application
identifier (a name) and pass it to gtk_application_new() as parameter. For
this example org.gtk.example is used. For choosing an identifier for your
application, see this guide.
Lastly, gtk_application_new() takes GApplicationFlags as input
for your application, if your application would have special needs.
Next the activate signal is
connected to the activate() function above the main() function. The activate
signal will be emitted when your application is launched with g_application_run()
on the line below. The g_application_run() call also takes as arguments the
command line arguments (the argc count and the argv string array).
Your application can override the command line handling, e.g. to open
files passed on the commandline.
Within g_application_run() the activate signal is sent and we then proceed
into the activate() function of the application. This is where we construct
our GTK window, so that a window is shown when the application is launched.
The call to gtk_application_window_new() will create a new
GtkApplicationWindow and store a pointer to it in the window variable.
The window will have a frame, a title bar, and window controls depending on the platform.
A window title is set using gtk_window_set_title(). This function
takes a GtkWindow pointer and a string as input. As our window pointer
is a GtkWidget pointer, we need to cast it to GtkWindow; instead of
casting window via a typical C cast like (GtkWindow*), window can be
cast using the macro GTK_WINDOW(). GTK_WINDOW() will check if the
pointer is an instance of the GtkWindow class, before casting, and emit a
warning if the check fails. More information about this convention can be
found in the GObject documentation.
Finally the window size is set using gtk_window_set_default_size()
and the window is then shown by GTK via gtk_window_present().
When you close the window, by (for example) pressing the X button, the
g_application_run() call returns with a number which is saved inside an
integer variable named status. Afterwards, the GtkApplication object is
freed from memory with g_object_unref(). Finally the status integer is
returned and the application exits.
While the program is running, GTK is receiving events. These are typically input events caused by the user interacting with your program, but also things like messages from the window manager or other applications. GTK processes these and as a result, signals may be emitted on your widgets. Connecting handlers for these signals is how you normally make your program do something in response to user input.
The following example is slightly more complex, and tries to showcase some of the capabilities of GTK.
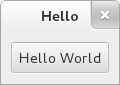
Hello, World
In the long tradition of programming languages and libraries, this example is called Hello, World.
Hello World in C
Create a new file with the following content named example-1.c.
#include <gtk/gtk.h>

static void
print_hello (GtkWidget *widget,
             gpointer   data)
{
  g_print ("Hello World\n");
}

static void
activate (GtkApplication *app,
          gpointer        user_data)
{
  GtkWidget *window;
  GtkWidget *button;
  GtkWidget *box;

  window = gtk_application_window_new (app);
  gtk_window_set_title (GTK_WINDOW (window), "Window");
  gtk_window_set_default_size (GTK_WINDOW (window), 200, 200);

  box = gtk_box_new (GTK_ORIENTATION_VERTICAL, 0);
  gtk_widget_set_halign (box, GTK_ALIGN_CENTER);
  gtk_widget_set_valign (box, GTK_ALIGN_CENTER);

  gtk_window_set_child (GTK_WINDOW (window), box);

  button = gtk_button_new_with_label ("Hello World");

  g_signal_connect (button, "clicked", G_CALLBACK (print_hello), NULL);
  g_signal_connect_swapped (button, "clicked", G_CALLBACK (gtk_window_destroy), window);

  gtk_box_append (GTK_BOX (box), button);

  gtk_window_present (GTK_WINDOW (window));
}

int
main (int    argc,
      char **argv)
{
  GtkApplication *app;
  int status;

  app = gtk_application_new ("org.gtk.example", G_APPLICATION_DEFAULT_FLAGS);
  g_signal_connect (app, "activate", G_CALLBACK (activate), NULL);
  status = g_application_run (G_APPLICATION (app), argc, argv);
  g_object_unref (app);

  return status;
}
You can compile the program above with GCC using:
gcc $( pkg-config --cflags gtk4 ) -o example-1 example-1.c $( pkg-config --libs gtk4 )
As seen above, example-1.c builds further upon example-0.c by adding a
button to our window, with the label “Hello World”. Two new GtkWidget
pointers are declared to accomplish this, button and box. The box
variable is created to store a GtkBox, which is one of GTK’s ways
of controlling the size and layout of widgets.
The GtkBox widget is created with gtk_box_new(), which takes a
GtkOrientation enumeration value as parameter. The buttons which
this box will contain can either be laid out horizontally or vertically.
This does not matter in this particular case, as we are dealing with only
one button. After initializing box with the newly created GtkBox, the code
adds the box widget to the window widget using gtk_window_set_child().
Next the button variable is initialized in similar manner.
gtk_button_new_with_label() is called which returns a
GtkButton to be stored in button. Afterwards button is added to
our box.
Using g_signal_connect(), the button is connected to a function in our app called
print_hello(), so that when the button is clicked, GTK will call this function.
As the print_hello() function does not use any data as input, NULL is passed
to it. print_hello() calls g_print() with the string “Hello World” which will
print Hello World in a terminal if the GTK application was started from one.
After connecting print_hello(), another signal is connected to the “clicked”
state of the button using g_signal_connect_swapped(). This functions is similar
to a g_signal_connect(), with the difference lying in how the callback function
is treated; g_signal_connect_swapped() allows you to specify what the callback
function should take as parameter by letting you pass it as data. In this case
the function being called back is gtk_window_destroy() and the window pointer
is passed to it. This has the effect that when the button is clicked, the whole
GTK window is destroyed. In contrast if a normal g_signal_connect() were used
to connect the “clicked” signal with gtk_window_destroy(), then the function
would be called on button (which would not go well, since the function expects
a GtkWindow as argument).
The rest of the code in example-1.c is identical to example-0.c. The next
section will elaborate further on how to add several GtkWidgets to your
GTK application.
Packing
When creating an application, you’ll want to put more than one widget inside a window. When you do so, it becomes important to control how each widget is positioned and sized. This is where packing comes in.
GTK comes with a large variety of layout containers whose purpose it is to control the layout of the child widgets that are added to them, like:
The following example shows how the GtkGrid container lets you
arrange several buttons:

Packing buttons
Create a new file with the following content named example-2.c.
#include <gtk/gtk.h>

static void
print_hello (GtkWidget *widget,
             gpointer   data)
{
  g_print ("Hello World\n");
}

static void
activate (GtkApplication *app,
          gpointer        user_data)
{
  GtkWidget *window;
  GtkWidget *grid;
  GtkWidget *button;

  /* create a new window, and set its title */
  window = gtk_application_window_new (app);
  gtk_window_set_title (GTK_WINDOW (window), "Window");

  /* Here we construct the container that is going pack our buttons */
  grid = gtk_grid_new ();

  /* Pack the container in the window */
  gtk_window_set_child (GTK_WINDOW (window), grid);

  button = gtk_button_new_with_label ("Button 1");
  g_signal_connect (button, "clicked", G_CALLBACK (print_hello), NULL);

  /* Place the first button in the grid cell (0, 0), and make it fill
   * just 1 cell horizontally and vertically (ie no spanning)
   */
  gtk_grid_attach (GTK_GRID (grid), button, 0, 0, 1, 1);

  button = gtk_button_new_with_label ("Button 2");
  g_signal_connect (button, "clicked", G_CALLBACK (print_hello), NULL);

  /* Place the second button in the grid cell (1, 0), and make it fill
   * just 1 cell horizontally and vertically (ie no spanning)
   */
  gtk_grid_attach (GTK_GRID (grid), button, 1, 0, 1, 1);

  button = gtk_button_new_with_label ("Quit");
  g_signal_connect_swapped (button, "clicked", G_CALLBACK (gtk_window_destroy), window);

  /* Place the Quit button in the grid cell (0, 1), and make it
   * span 2 columns.
   */
  gtk_grid_attach (GTK_GRID (grid), button, 0, 1, 2, 1);

  gtk_window_present (GTK_WINDOW (window));
}

int
main (int    argc,
      char **argv)
{
  GtkApplication *app;
  int status;

  app = gtk_application_new ("org.gtk.example", G_APPLICATION_DEFAULT_FLAGS);
  g_signal_connect (app, "activate", G_CALLBACK (activate), NULL);
  status = g_application_run (G_APPLICATION (app), argc, argv);
  g_object_unref (app);

  return status;
}
You can compile the program above with GCC using:
gcc $( pkg-config --cflags gtk4 ) -o example-2 example-2.c $( pkg-config --libs gtk4 )
Custom Drawing
Many widgets, like buttons, do all their drawing themselves. You just tell
them the label you want to see, and they figure out what font to use, draw
the button outline and focus rectangle, etc. Sometimes, it is necessary to
do some custom drawing. In that case, a GtkDrawingArea might be the right
widget to use. It offers a canvas on which you can draw by setting its
draw function.
The contents of a widget often need to be partially or fully redrawn, e.g.
when another window is moved and uncovers part of the widget, or when the
window containing it is resized. It is also possible to explicitly cause a
widget to be redrawn, by calling gtk_widget_queue_draw(). GTK takes
care of most of the details by providing a ready-to-use cairo context to the
draw function.
The following example shows how to use a draw function with GtkDrawingArea.
It is a bit more complicated than the previous examples, since it also
demonstrates input event handling with event controllers.
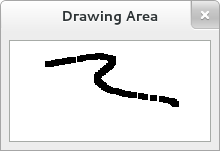
Drawing in response to input
Create a new file with the following content named example-3.c.
#include <gtk/gtk.h>

/* Surface to store current scribbles */
static cairo_surface_t *surface = NULL;

static void
clear_surface (void)
{
  cairo_t *cr;

  cr = cairo_create (surface);

  cairo_set_source_rgb (cr, 1, 1, 1);
  cairo_paint (cr);

  cairo_destroy (cr);
}

/* Create a new surface of the appropriate size to store our scribbles */
static void
resize_cb (GtkWidget *widget,
           int        width,
           int        height,
           gpointer   data)
{
  if (surface)
    {
      cairo_surface_destroy (surface);
      surface = NULL;
    }

  if (gtk_native_get_surface (gtk_widget_get_native (widget)))
    {
      surface = cairo_image_surface_create (CAIRO_FORMAT_ARGB32,
                                            gtk_widget_get_width (widget),
                                            gtk_widget_get_height (widget));

      /* Initialize the surface to white */
      clear_surface ();
    }
}

/* Redraw the screen from the surface. Note that the draw
 * callback receives a ready-to-be-used cairo_t that is already
 * clipped to only draw the exposed areas of the widget
 */
static void
draw_cb (GtkDrawingArea *drawing_area,
         cairo_t        *cr,
         int             width,
         int             height,
         gpointer        data)
{
  cairo_set_source_surface (cr, surface, 0, 0);
  cairo_paint (cr);
}

/* Draw a rectangle on the surface at the given position */
static void
draw_brush (GtkWidget *widget,
            double     x,
            double     y)
{
  cairo_t *cr;

  /* Paint to the surface, where we store our state */
  cr = cairo_create (surface);

  cairo_rectangle (cr, x - 3, y - 3, 6, 6);
  cairo_fill (cr);

  cairo_destroy (cr);

  /* Now invalidate the drawing area. */
  gtk_widget_queue_draw (widget);
}

static double start_x;
static double start_y;

static void
drag_begin (GtkGestureDrag *gesture,
            double          x,
            double          y,
            GtkWidget      *area)
{
  start_x = x;
  start_y = y;

  draw_brush (area, x, y);
}

static void
drag_update (GtkGestureDrag *gesture,
             double          x,
             double          y,
             GtkWidget      *area)
{
  draw_brush (area, start_x + x, start_y + y);
}

static void
drag_end (GtkGestureDrag *gesture,
          double          x,
          double          y,
          GtkWidget      *area)
{
  draw_brush (area, start_x + x, start_y + y);
}

static void
pressed (GtkGestureClick *gesture,
         int              n_press,
         double           x,
         double           y,
         GtkWidget       *area)
{
  clear_surface ();
  gtk_widget_queue_draw (area);
}

static void
close_window (void)
{
  if (surface)
    cairo_surface_destroy (surface);
}

static void
activate (GtkApplication *app,
          gpointer        user_data)
{
  GtkWidget *window;
  GtkWidget *frame;
  GtkWidget *drawing_area;
  GtkGesture *drag;
  GtkGesture *press;

  window = gtk_application_window_new (app);
  gtk_window_set_title (GTK_WINDOW (window), "Drawing Area");

  g_signal_connect (window, "destroy", G_CALLBACK (close_window), NULL);

  frame = gtk_frame_new (NULL);
  gtk_window_set_child (GTK_WINDOW (window), frame);

  drawing_area = gtk_drawing_area_new ();
  /* set a minimum size */
  gtk_widget_set_size_request (drawing_area, 100, 100);

  gtk_frame_set_child (GTK_FRAME (frame), drawing_area);

  gtk_drawing_area_set_draw_func (GTK_DRAWING_AREA (drawing_area), draw_cb, NULL, NULL);

  g_signal_connect_after (drawing_area, "resize", G_CALLBACK (resize_cb), NULL);

  drag = gtk_gesture_drag_new ();
  gtk_gesture_single_set_button (GTK_GESTURE_SINGLE (drag), GDK_BUTTON_PRIMARY);
  gtk_widget_add_controller (drawing_area, GTK_EVENT_CONTROLLER (drag));
  g_signal_connect (drag, "drag-begin", G_CALLBACK (drag_begin), drawing_area);
  g_signal_connect (drag, "drag-update", G_CALLBACK (drag_update), drawing_area);
  g_signal_connect (drag, "drag-end", G_CALLBACK (drag_end), drawing_area);

  press = gtk_gesture_click_new ();
  gtk_gesture_single_set_button (GTK_GESTURE_SINGLE (press), GDK_BUTTON_SECONDARY);
  gtk_widget_add_controller (drawing_area, GTK_EVENT_CONTROLLER (press));

  g_signal_connect (press, "pressed", G_CALLBACK (pressed), drawing_area);

  gtk_window_present (GTK_WINDOW (window));
}

int
main (int    argc,
      char **argv)
{
  GtkApplication *app;
  int status;

  app = gtk_application_new ("org.gtk.example", G_APPLICATION_DEFAULT_FLAGS);
  g_signal_connect (app, "activate", G_CALLBACK (activate), NULL);
  status = g_application_run (G_APPLICATION (app), argc, argv);
  g_object_unref (app);

  return status;
}
You can compile the program above with GCC using:
gcc $( pkg-config --cflags gtk4 ) -o example-3 example-3.c $( pkg-config --libs gtk4 )
Building user interfaces
When constructing a more complicated user interface, with dozens or hundreds of widgets, doing all the setup work in C code is cumbersome, and making changes becomes next to impossible.
Thankfully, GTK supports the separation of user interface
layout from your business logic, by using UI descriptions in an
XML format that can be parsed by the GtkBuilder class.
Packing buttons with GtkBuilder
Create a new file with the following content named example-4.c.
#include <gtk/gtk.h>
#include <glib/gstdio.h>

static void
print_hello (GtkWidget *widget,
             gpointer   data)
{
  g_print ("Hello World\n");
}

static void
quit_cb (GtkWindow *window)
{
  gtk_window_close (window);
}

static void
activate (GtkApplication *app,
          gpointer        user_data)
{
  /* Construct a GtkBuilder instance and load our UI description */
  GtkBuilder *builder = gtk_builder_new ();
  gtk_builder_add_from_file (builder, "builder.ui", NULL);

  /* Connect signal handlers to the constructed widgets. */
  GObject *window = gtk_builder_get_object (builder, "window");
  gtk_window_set_application (GTK_WINDOW (window), app);

  GObject *button = gtk_builder_get_object (builder, "button1");
  g_signal_connect (button, "clicked", G_CALLBACK (print_hello), NULL);

  button = gtk_builder_get_object (builder, "button2");
  g_signal_connect (button, "clicked", G_CALLBACK (print_hello), NULL);

  button = gtk_builder_get_object (builder, "quit");
  g_signal_connect_swapped (button, "clicked", G_CALLBACK (quit_cb), window);

  gtk_widget_set_visible (GTK_WIDGET (window), TRUE);

  /* We do not need the builder any more */
  g_object_unref (builder);
}

int
main (int   argc,
      char *argv[])
{
#ifdef GTK_SRCDIR
  g_chdir (GTK_SRCDIR);
#endif

  GtkApplication *app = gtk_application_new ("org.gtk.example", G_APPLICATION_DEFAULT_FLAGS);
  g_signal_connect (app, "activate", G_CALLBACK (activate), NULL);

  int status = g_application_run (G_APPLICATION (app), argc, argv);
  g_object_unref (app);

  return status;
}
Create a new file with the following content named builder.ui.
<?xml version="1.0" encoding="UTF-8"?>
<interface>
  <object id="window" class="GtkWindow">
    <property name="title">Grid</property>
    <child>
      <object id="grid" class="GtkGrid">
        <child>
          <object id="button1" class="GtkButton">
            <property name="label">Button 1</property>
            <layout>
              <property name="column">0</property>
              <property name="row">0</property>
            </layout>
          </object>
        </child>
        <child>
          <object id="button2" class="GtkButton">
            <property name="label">Button 2</property>
            <layout>
              <property name="column">1</property>
              <property name="row">0</property>
            </layout>
          </object>
        </child>
        <child>
          <object id="quit" class="GtkButton">
            <property name="label">Quit</property>
            <layout>
              <property name="column">0</property>
              <property name="row">1</property>
              <property name="column-span">2</property>
            </layout>
          </object>
        </child>
      </object>
    </child>
  </object>
</interface>
You can compile the program above with GCC using:
gcc $( pkg-config --cflags gtk4 ) -o example-4 example-4.c $( pkg-config --libs gtk4 )
Note that GtkBuilder can also be used to construct objects that are
not widgets, such as tree models, adjustments, etc. That is the reason
the method we use here is called gtk_builder_get_object() and
returns a GObject instead of a GtkWidget.
Normally, you would pass a full path to gtk_builder_add_from_file() to
make the execution of your program independent of the current directory.
A common location to install UI descriptions and similar data is
/usr/share/appname.
It is also possible to embed the UI description in the source code as a
string and use gtk_builder_add_from_string() to load it. But keeping
the UI description in a separate file has several advantages:
- it is possible to make minor adjustments to the UI without recompiling your program
- it is easier to isolate the UI code from the business logic of your application
- it is easier to restructure your UI into separate classes using composite widget templates
Using GResource it is possible to combine the best of both worlds: you can keep the UI definition files separate inside your source code repository, and then ship them embedded into your application.
Building applications
An application consists of a number of files:
- The binary
- This gets installed in
/usr/bin. - A desktop file
- The desktop file provides important information about the application to
the desktop shell, such as its name, icon, D-Bus name, commandline to launch
it, etc. It is installed in
/usr/share/applications. - An icon
- The icon gets installed in
/usr/share/icons/hicolor/48x48/apps, where it will be found regardless of the current theme. - A settings schema
- If the application uses GSettings, it will install its schema in
/usr/share/glib-2.0/schemas, so that tools like dconf-editor can find it. - Other resources
- Other files, such as GtkBuilder ui files, are best loaded from
resources stored in the application binary itself. This eliminates the
need for most of the files that would traditionally be installed in
an application-specific location in
/usr/share.
GTK includes application support that is built on top of GApplication. In this
tutorial we’ll build a simple application by starting from scratch, adding more
and more pieces over time. Along the way, we’ll learn about GtkApplication,
templates, resources, application menus, settings, GtkHeaderBar, GtkStack,
GtkSearchBar, GtkListBox, and more.
The full, buildable sources for these examples can be found in the
examples directory of the GTK source distribution, or
online in the GTK
source code repository. You can build each example separately by using make
with the Makefile.example file. For more information, see the README
included in the examples directory.
A trivial application
When using GtkApplication, the main() function can be very simple. We just call
g_application_run() and give it an instance of our application class.
#include <gtk/gtk.h>

#include "exampleapp.h"

int
main (int argc, char *argv[])
{
  return g_application_run (G_APPLICATION (example_app_new ()), argc, argv);
}
All the application logic is in the application class, which is a subclass of
GtkApplication. Our example does not yet have any interesting functionality.
All it does is open a window when it is activated without arguments, and open
the files it is given, if it is started with arguments.
To handle these two cases, we override the activate() vfunc, which gets
called when the application is launched without commandline arguments, and
the open() virtual function, which gets called when the application is
launched with commandline arguments.
To learn more about GApplication entry points, consult the GIO
documentation.
#include <gtk/gtk.h>

#include "exampleapp.h"
#include "exampleappwin.h"

struct _ExampleApp
{
  GtkApplication parent;
};

G_DEFINE_TYPE(ExampleApp, example_app, GTK_TYPE_APPLICATION);

static void
example_app_init (ExampleApp *app)
{
}

static void
example_app_activate (GApplication *app)
{
  ExampleAppWindow *win;

  win = example_app_window_new (EXAMPLE_APP (app));
  gtk_window_present (GTK_WINDOW (win));
}

static void
example_app_open (GApplication  *app,
                  GFile        **files,
                  int            n_files,
                  const char    *hint)
{
  GList *windows;
  ExampleAppWindow *win;
  int i;

  windows = gtk_application_get_windows (GTK_APPLICATION (app));
  if (windows)
    win = EXAMPLE_APP_WINDOW (windows->data);
  else
    win = example_app_window_new (EXAMPLE_APP (app));

  for (i = 0; i < n_files; i++)
    example_app_window_open (win, files[i]);

  gtk_window_present (GTK_WINDOW (win));
}

static void
example_app_class_init (ExampleAppClass *class)
{
  G_APPLICATION_CLASS (class)->activate = example_app_activate;
  G_APPLICATION_CLASS (class)->open = example_app_open;
}

ExampleApp *
example_app_new (void)
{
  return g_object_new (EXAMPLE_APP_TYPE,
                       "application-id", "org.gtk.exampleapp",
                       "flags", G_APPLICATION_HANDLES_OPEN,
                       NULL);
}
Another important class that is part of the application support in GTK is
GtkApplicationWindow. It is typically subclassed as well. Our
subclass does not do anything yet, so we will just get an empty window.
#include <gtk/gtk.h>

#include "exampleapp.h"
#include "exampleappwin.h"

struct _ExampleAppWindow
{
  GtkApplicationWindow parent;
};

G_DEFINE_TYPE(ExampleAppWindow, example_app_window, GTK_TYPE_APPLICATION_WINDOW);

static void
example_app_window_init (ExampleAppWindow *app)
{
}

static void
example_app_window_class_init (ExampleAppWindowClass *class)
{
}

ExampleAppWindow *
example_app_window_new (ExampleApp *app)
{
  return g_object_new (EXAMPLE_APP_WINDOW_TYPE, "application", app, NULL);
}

void
example_app_window_open (ExampleAppWindow *win,
                         GFile            *file)
{
}
As part of the initial setup of our application, we also create an icon and a desktop file.

[Desktop Entry]
Type=Application
Name=Example
Icon=exampleapp
StartupNotify=true
Exec=@bindir@/exampleapp
Note that `bindir@` needs to be replaced with the actual path to the binary
before this desktop file can be used.
Here is what we’ve achieved so far:
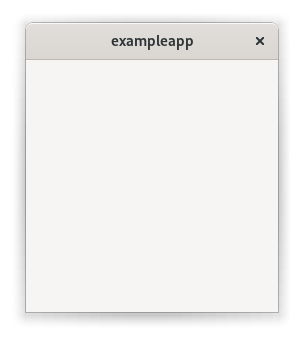
This does not look very impressive yet, but our application is already presenting itself on the session bus, it has single-instance semantics, and it accepts files as commandline arguments.
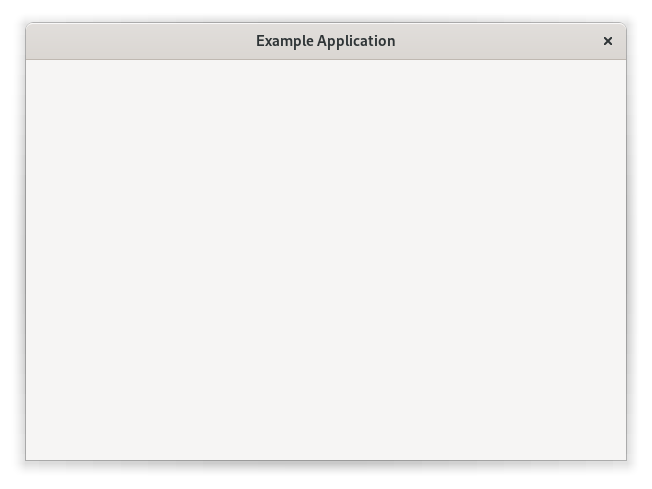
Populating the window
In this step, we use a GtkBuilder template to associate a
GtkBuilder ui file with our application window class.
Our simple ui file gives the window a title, and puts a GtkStack
widget as the main content.
<?xml version="1.0" encoding="UTF-8"?>
<interface>
  <template class="ExampleAppWindow" parent="GtkApplicationWindow">
    <property name="title" translatable="yes">Example Application</property>
    <property name="default-width">600</property>
    <property name="default-height">400</property>
    <child>
      <object class="GtkBox" id="content_box">
        <property name="orientation">vertical</property>
        <child>
          <object class="GtkStack" id="stack"/>
        </child>
      </object>
    </child>
  </template>
</interface>
To make use of this file in our application, we revisit our
GtkApplicationWindow subclass, and call
gtk_widget_class_set_template_from_resource() from the class init
function to set the ui file as template for this class. We also
add a call to gtk_widget_init_template() in the instance init
function to instantiate the template for each instance of our class.
 ...

static void
example_app_window_init (ExampleAppWindow *win)
{
  gtk_widget_init_template (GTK_WIDGET (win));
}

static void
example_app_window_class_init (ExampleAppWindowClass *class)
{
  gtk_widget_class_set_template_from_resource (GTK_WIDGET_CLASS (class),
                                               "/org/gtk/exampleapp/window.ui");
}

 ...
You may have noticed that we used the _from_resource() variant of the function
that sets a template. Now we need to use
GLib’s resource functionality
to include the ui file in the binary. This is commonly done by listing all resources
in a .gresource.xml file, such as this:
<?xml version="1.0" encoding="UTF-8"?>
<gresources>
  <gresource prefix="/org/gtk/exampleapp">
    <file preprocess="xml-stripblanks">window.ui</file>
  </gresource>
</gresources>
This file has to be converted into a C source file that will be compiled and linked
into the application together with the other source files. To do so, we use the
glib-compile-resources utility:
glib-compile-resources exampleapp.gresource.xml --target=resources.c --generate-source
The gnome module of the Meson build system
provides the gnome.compile_resources()
method for this task.
Our application now looks like this:
Opening files
In this step, we make our application show the content of all the files that it is given on the commandline.
Note: Providing filenames (e.g. ./exampleapp examplewin.c examplewin.h) at
the command line is a requirement for example apps 3-9 to display as shown in
the screenshots below.
To this end, we add a member to the struct of our application window subclass
and keep a reference to the GtkStack there. The first member of the struct
should be the parent type from which the class is derived. Here,
ExampleAppWindow is derived from GtkApplicationWindow. The
gtk_widget_class_bind_template_child() function arranges things so that after
instantiating the template, the stack member of the struct will point to the
widget of the same name from the template.
...

struct _ExampleAppWindow
{
  GtkApplicationWindow parent;

  GtkWidget *stack;
};

G_DEFINE_TYPE (ExampleAppWindow, example_app_window, GTK_TYPE_APPLICATION_WINDOW)

...

static void
example_app_window_class_init (ExampleAppWindowClass *class)
{
  gtk_widget_class_set_template_from_resource (GTK_WIDGET_CLASS (class),
                                               "/org/gtk/exampleapp/window.ui");
  gtk_widget_class_bind_template_child (GTK_WIDGET_CLASS (class), ExampleAppWindow, stack);
}

...
Now we revisit the example_app_window_open() function that is called for each
commandline argument, and construct a GtkTextView that we then add as a page
to the stack:
...

void
example_app_window_open (ExampleAppWindow *win,
                         GFile            *file)
{
  char *basename;
  GtkWidget *scrolled, *view;
  char *contents;
  gsize length;

  basename = g_file_get_basename (file);

  scrolled = gtk_scrolled_window_new ();
  gtk_widget_set_hexpand (scrolled, TRUE);
  gtk_widget_set_vexpand (scrolled, TRUE);
  view = gtk_text_view_new ();
  gtk_text_view_set_editable (GTK_TEXT_VIEW (view), FALSE);
  gtk_text_view_set_cursor_visible (GTK_TEXT_VIEW (view), FALSE);
  gtk_scrolled_window_set_child (GTK_SCROLLED_WINDOW (scrolled), view);
  gtk_stack_add_titled (GTK_STACK (win->stack), scrolled, basename, basename);

  if (g_file_load_contents (file, NULL, &contents, &length, NULL, NULL))
    {
      GtkTextBuffer *buffer;

      buffer = gtk_text_view_get_buffer (GTK_TEXT_VIEW (view));
      gtk_text_buffer_set_text (buffer, contents, length);
      g_free (contents);
    }

  g_free (basename);
}

...
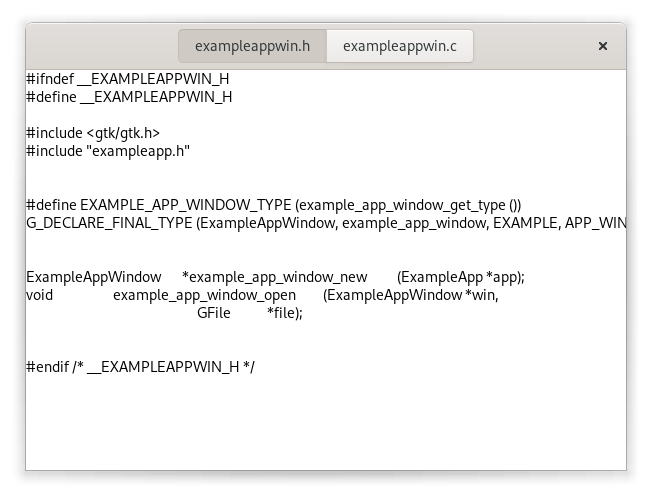
Lastly, we add a GtkStackSwitcher to the titlebar area in the UI file, and we
tell it to display information about our stack.
The stack switcher gets all its information it needs to display tabs from
the stack that it belongs to. Here, we are passing the label to show for
each file as the last argument to the gtk_stack_add_titled() function.
Our application is beginning to take shape:
A menu
The menu is shown at the right side of the headerbar. It is meant to collect infrequently used actions that affect the whole application.
Just like the window template, we specify our menu in a ui file, and add it as a resource to our binary.
<?xml version="1.0" encoding="UTF-8"?>
<interface>
  <menu id="menu">
    <section>
      <item>
        <attribute name="label" translatable="yes">_Preferences</attribute>
        <attribute name="action">app.preferences</attribute>
      </item>
    </section>
    <section>
      <item>
        <attribute name="label" translatable="yes">_Quit</attribute>
        <attribute name="action">app.quit</attribute>
      </item>
    </section>
  </menu>
</interface>
To make the menu appear, we have to load the ui file and associate the resulting menu model with the menu button that we’ve added to the headerbar. Since menus work by activating GActions, we also have to add a suitable set of actions to our application.
Adding the actions is best done in the startup() vfunc, which is guaranteed
to be called once for each primary application instance:
...

static void
preferences_activated (GSimpleAction *action,
                       GVariant      *parameter,
                       gpointer       app)
{
}

static void
quit_activated (GSimpleAction *action,
                GVariant      *parameter,
                gpointer       app)
{
  g_application_quit (G_APPLICATION (app));
}

static GActionEntry app_entries[] =
{
  { "preferences", preferences_activated, NULL, NULL, NULL },
  { "quit", quit_activated, NULL, NULL, NULL }
};

static void
example_app_startup (GApplication *app)
{
  GtkBuilder *builder;
  GMenuModel *app_menu;
  const char *quit_accels[2] = { "<Ctrl>Q", NULL };

  G_APPLICATION_CLASS (example_app_parent_class)->startup (app);

  g_action_map_add_action_entries (G_ACTION_MAP (app),
                                   app_entries, G_N_ELEMENTS (app_entries),
                                   app);
  gtk_application_set_accels_for_action (GTK_APPLICATION (app),
                                         "app.quit",
                                         quit_accels);
}

static void
example_app_class_init (ExampleAppClass *class)
{
  G_APPLICATION_CLASS (class)->startup = example_app_startup;
  ...
}

...
Our preferences menu item does not do anything yet, but the Quit menu item
is fully functional. Note that it can also be activated by the usual Ctrl-Q
shortcut. The shortcut was added with gtk_application_set_accels_for_action().
The application menu looks like this:

A preference dialog
A typical application will have a some preferences that should be remembered from one run to the next. Even for our simple example application, we may want to change the font that is used for the content.
We are going to use GSettings to store our preferences. GSettings requires
a schema that describes our settings:
<?xml version="1.0" encoding="UTF-8"?>
<schemalist>
  <schema path="/org/gtk/exampleapp/" id="org.gtk.exampleapp">
    <key name="font" type="s">
      <default>'Monospace 12'</default>
      <summary>Font</summary>
      <description>The font to be used for content.</description>
    </key>
    <key name="transition" type="s">
      <choices>
        <choice value='none'/>
        <choice value='crossfade'/>
        <choice value='slide-left-right'/>
      </choices>
      <default>'none'</default>
      <summary>Transition</summary>
      <description>The transition to use when switching tabs.</description>
    </key>
  </schema>
</schemalist>
Before we can make use of this schema in our application, we need to compile
it into the binary form that GSettings expects. GIO provides macros to do
this in Autotools-based projects, and the gnome module of the Meson build
system provides the gnome.compile_schemas()
method for this task.
Next, we need to connect our settings to the widgets that they are supposed
to control. One convenient way to do this is to use GSettings bind
functionality to bind settings keys to object properties, as we do here
for the transition setting.
...

static void
example_app_window_init (ExampleAppWindow *win)
{
  gtk_widget_init_template (GTK_WIDGET (win));
  win->settings = g_settings_new ("org.gtk.exampleapp");

  g_settings_bind (win->settings, "transition",
                   win->stack, "transition-type",
                   G_SETTINGS_BIND_DEFAULT);
}

...
The code to connect the font setting is a little more involved, since there is no simple object property that it corresponds to, so we are not going to go into that here.
At this point, the application will already react if you change one of the
settings, e.g. using the gsettings command line tool. Of course, we expect
the application to provide a preference dialog for these. So lets do that
now. Our preference dialog will be a subclass of GtkDialog, and
we’ll use the same techniques that we’ve already seen: templates, private
structs, settings bindings.
Lets start with the template.
<?xml version="1.0" encoding="UTF-8"?>
<interface>
  <template class="ExampleAppPrefs" parent="GtkDialog">
    <property name="title" translatable="yes">Preferences</property>
    <property name="resizable">0</property>
    <property name="modal">1</property>
    <child internal-child="content_area">
      <object class="GtkBox" id="content_area">
        <child>
          <object class="GtkGrid" id="grid">
            <property name="margin-start">12</property>
            <property name="margin-end">12</property>
            <property name="margin-top">12</property>
            <property name="margin-bottom">12</property>
            <property name="row-spacing">12</property>
            <property name="column-spacing">12</property>
            <child>
              <object class="GtkLabel" id="fontlabel">
                <property name="label">_Font:</property>
                <property name="use-underline">1</property>
                <property name="mnemonic-widget">font</property>
                <property name="xalign">1</property>
                <layout>
                  <property name="column">0</property>
                  <property name="row">0</property>
                </layout>
              </object>
            </child>
            <child>
              <object class="GtkFontButton" id="font">
                <layout>
                  <property name="column">1</property>
                  <property name="row">0</property>
                </layout>
              </object>
            </child>
            <child>
              <object class="GtkLabel" id="transitionlabel">
                <property name="label">_Transition:</property>
                <property name="use-underline">1</property>
                <property name="mnemonic-widget">transition</property>
                <property name="xalign">1</property>
                <layout>
                  <property name="column">0</property>
                  <property name="row">1</property>
                </layout>
              </object>
            </child>
            <child>
              <object class="GtkComboBoxText" id="transition">
                <items>
                  <item translatable="yes" id="none">None</item>
                  <item translatable="yes" id="crossfade">Fade</item>
                  <item translatable="yes" id="slide-left-right">Slide</item>
                </items>
                <layout>
                  <property name="column">1</property>
                  <property name="row">1</property>
                </layout>
              </object>
            </child>
          </object>
        </child>
      </object>
    </child>
  </template>
</interface>
Next comes the dialog subclass.
#include <gtk/gtk.h>

#include "exampleapp.h"
#include "exampleappwin.h"
#include "exampleappprefs.h"

struct _ExampleAppPrefs
{
  GtkDialog parent;

  GSettings *settings;
  GtkWidget *font;
  GtkWidget *transition;
};

G_DEFINE_TYPE (ExampleAppPrefs, example_app_prefs, GTK_TYPE_DIALOG)

static void
example_app_prefs_init (ExampleAppPrefs *prefs)
{
  gtk_widget_init_template (GTK_WIDGET (prefs));
  prefs->settings = g_settings_new ("org.gtk.exampleapp");

  g_settings_bind (prefs->settings, "font",
                   prefs->font, "font",
                   G_SETTINGS_BIND_DEFAULT);
  g_settings_bind (prefs->settings, "transition",
                   prefs->transition, "active-id",
                   G_SETTINGS_BIND_DEFAULT);
}

static void
example_app_prefs_dispose (GObject *object)
{
  ExampleAppPrefs *prefs;

  prefs = EXAMPLE_APP_PREFS (object);

  g_clear_object (&prefs->settings);

  G_OBJECT_CLASS (example_app_prefs_parent_class)->dispose (object);
}

static void
example_app_prefs_class_init (ExampleAppPrefsClass *class)
{
  G_OBJECT_CLASS (class)->dispose = example_app_prefs_dispose;

  gtk_widget_class_set_template_from_resource (GTK_WIDGET_CLASS (class),
                                               "/org/gtk/exampleapp/prefs.ui");
  gtk_widget_class_bind_template_child (GTK_WIDGET_CLASS (class), ExampleAppPrefs, font);
  gtk_widget_class_bind_template_child (GTK_WIDGET_CLASS (class), ExampleAppPrefs, transition);
}

ExampleAppPrefs *
example_app_prefs_new (ExampleAppWindow *win)
{
  return g_object_new (EXAMPLE_APP_PREFS_TYPE, "transient-for", win, "use-header-bar", TRUE, NULL);
}
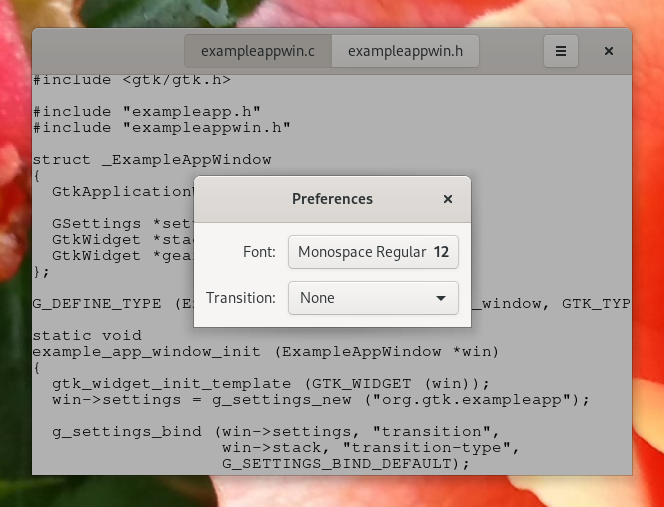
Now we revisit the preferences_activated() function in our application
class, and make it open a new preference dialog.
...

static void
preferences_activated (GSimpleAction *action,
                       GVariant      *parameter,
                       gpointer       app)
{
  ExampleAppPrefs *prefs;
  GtkWindow *win;

  win = gtk_application_get_active_window (GTK_APPLICATION (app));
  prefs = example_app_prefs_new (EXAMPLE_APP_WINDOW (win));
  gtk_window_present (GTK_WINDOW (prefs));
}

...
After all this work, our application can now show a preference dialog like this:
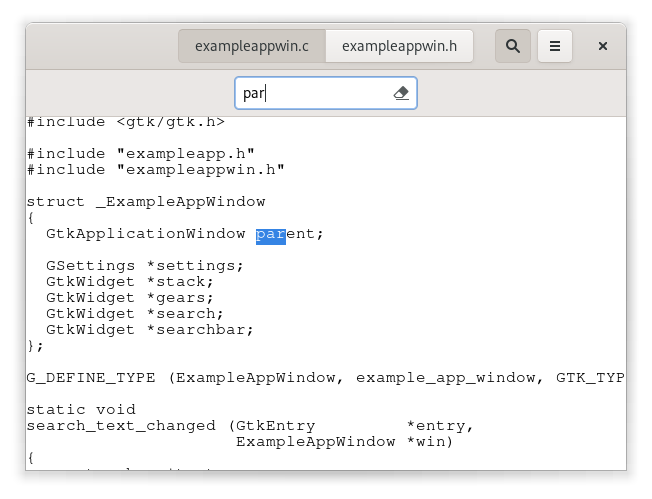
Adding a search bar
We continue to flesh out the functionality of our application. For now, we
add search. GTK supports this with GtkSearchEntry and
GtkSearchBar. The search bar is a widget that can slide in from the
top to present a search entry.
We add a toggle button to the header bar, which can be used to slide out the search bar below the header bar.
<?xml version="1.0" encoding="UTF-8"?>
<interface>
  <template class="ExampleAppWindow" parent="GtkApplicationWindow">
    <property name="title" translatable="yes">Example Application</property>
    <property name="default-width">600</property>
    <property name="default-height">400</property>
    <child type="titlebar">
      <object class="GtkHeaderBar" id="header">
        <child type="title">
          <object class="GtkStackSwitcher" id="tabs">
            <property name="stack">stack</property>
          </object>
        </child>
        <child type="end">
          <object class="GtkMenuButton" id="gears">
            <property name="direction">none</property>
          </object>
        </child>
        <child type="end">
          <object class="GtkToggleButton" id="search">
            <property name="sensitive">0</property>
            <property name="icon-name">edit-find-symbolic</property>
          </object>
        </child>
      </object>
    </child>
    <child>
      <object class="GtkBox" id="content_box">
        <property name="orientation">vertical</property>
        <child>
          <object class="GtkSearchBar" id="searchbar">
            <child>
              <object class="GtkSearchEntry" id="searchentry">
                <signal name="search-changed" handler="search_text_changed"/>
              </object>
            </child>
          </object>
        </child>
        <child>
          <object class="GtkStack" id="stack">
            <signal name="notify::visible-child" handler="visible_child_changed"/>
          </object>
        </child>
      </object>
    </child>
  </template>
</interface>
Implementing the search needs quite a few code changes that we are not going to completely go over here. The central piece of the search implementation is a signal handler that listens for text changes in the search entry.
...

static void
search_text_changed (GtkEntry         *entry,
                     ExampleAppWindow *win)
{
  const char *text;
  GtkWidget *tab;
  GtkWidget *view;
  GtkTextBuffer *buffer;
  GtkTextIter start, match_start, match_end;

  text = gtk_editable_get_text (GTK_EDITABLE (entry));

  if (text[0] == '\0')
    return;

  tab = gtk_stack_get_visible_child (GTK_STACK (win->stack));
  view = gtk_scrolled_window_get_child (GTK_SCROLLED_WINDOW (tab));
  buffer = gtk_text_view_get_buffer (GTK_TEXT_VIEW (view));

  /* Very simple-minded search implementation */
  gtk_text_buffer_get_start_iter (buffer, &start);
  if (gtk_text_iter_forward_search (&start, text, GTK_TEXT_SEARCH_CASE_INSENSITIVE,
                                    &match_start, &match_end, NULL))
    {
      gtk_text_buffer_select_range (buffer, &match_start, &match_end);
      gtk_text_view_scroll_to_iter (GTK_TEXT_VIEW (view), &match_start,
                                    0.0, FALSE, 0.0, 0.0);
    }
}

static void
example_app_window_init (ExampleAppWindow *win)
{

...

  gtk_widget_class_bind_template_callback (GTK_WIDGET_CLASS (class), search_text_changed);

...

}

...
With the search bar, our application now looks like this:
Adding a side bar
As another piece of functionality, we are adding a sidebar, which demonstrates
GtkMenuButton, GtkRevealer and GtkListBox.
<?xml version="1.0" encoding="UTF-8"?>
<interface>
  <template class="ExampleAppWindow" parent="GtkApplicationWindow">
    <property name="title" translatable="yes">Example Application</property>
    <property name="default-width">600</property>
    <property name="default-height">400</property>
    <child type="titlebar">
      <object class="GtkHeaderBar" id="header">
        <child type="title">
          <object class="GtkStackSwitcher" id="tabs">
            <property name="stack">stack</property>
          </object>
        </child>
        <child type="end">
          <object class="GtkToggleButton" id="search">
            <property name="sensitive">0</property>
            <property name="icon-name">edit-find-symbolic</property>
          </object>
        </child>
        <child type="end">
          <object class="GtkMenuButton" id="gears">
            <property name="direction">none</property>
          </object>
        </child>
      </object>
    </child>
    <child>
      <object class="GtkBox" id="content_box">
        <property name="orientation">vertical</property>
        <child>
          <object class="GtkSearchBar" id="searchbar">
            <child>
              <object class="GtkSearchEntry" id="searchentry">
                <signal name="search-changed" handler="search_text_changed"/>
              </object>
            </child>
          </object>
        </child>
        <child>
          <object class="GtkBox" id="hbox">
            <child>
              <object class="GtkRevealer" id="sidebar">
                <property name="transition-type">slide-right</property>
                <child>
                  <object class="GtkScrolledWindow" id="sidebar-sw">
                    <property name="hscrollbar-policy">never</property>
                    <child>
                      <object class="GtkListBox" id="words">
                        <property name="selection-mode">none</property>
                      </object>
                    </child>
                  </object>
                </child>
              </object>
            </child>
            <child>
              <object class="GtkStack" id="stack">
                <signal name="notify::visible-child" handler="visible_child_changed"/>
              </object>
            </child>
          </object>
        </child>
      </object>
    </child>
  </template>
</interface>
The code to populate the sidebar with buttons for the words found in each file is a little too involved to go into here. But we’ll look at the code to add a checkbutton for the new feature to the menu.
<?xml version="1.0" encoding="UTF-8"?>
<interface>
  <menu id="menu">
    <section>
      <item>
        <attribute name="label" translatable="yes">_Words</attribute>
        <attribute name="action">win.show-words</attribute>
      </item>
      <item>
        <attribute name="label" translatable="yes">_Preferences</attribute>
        <attribute name="action">app.preferences</attribute>
      </item>
    </section>
    <section>
      <item>
        <attribute name="label" translatable="yes">_Quit</attribute>
        <attribute name="action">app.quit</attribute>
      </item>
    </section>
  </menu>
</interface>
To connect the menuitem to the show-words setting, we use
a GAction corresponding to the given GSettings key.
...

static void
example_app_window_init (ExampleAppWindow *win)
{

...

  builder = gtk_builder_new_from_resource ("/org/gtk/exampleapp/gears-menu.ui");
  menu = G_MENU_MODEL (gtk_builder_get_object (builder, "menu"));
  gtk_menu_button_set_menu_model (GTK_MENU_BUTTON (priv->gears), menu);
  g_object_unref (builder);

  action = g_settings_create_action (priv->settings, "show-words");
  g_action_map_add_action (G_ACTION_MAP (win), action);
  g_object_unref (action);
}

...
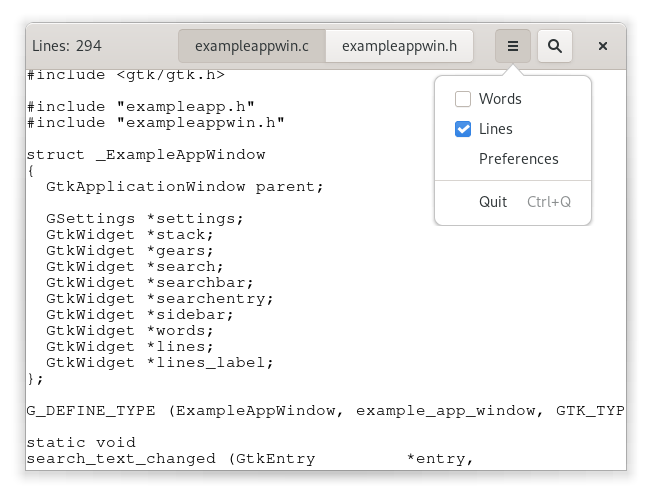
What our application looks like now:

Properties
Widgets and other objects have many useful properties.
Here we show some ways to use them in new and flexible ways, by wrapping
them in actions with GPropertyAction or by binding them with
GBinding.
To set this up, we add two labels to the header bar in our window template,
named lines_label and lines, and bind them to struct members in the
private struct, as we’ve seen a couple of times by now.
We add a new “Lines” menu item to the gears menu, which triggers the show-lines action:
<?xml version="1.0" encoding="UTF-8"?>
<interface>
  <menu id="menu">
    <section>
      <item>
        <attribute name="label" translatable="yes">_Words</attribute>
        <attribute name="action">win.show-words</attribute>
      </item>
      <item>
        <attribute name="label" translatable="yes">_Lines</attribute>
        <attribute name="action">win.show-lines</attribute>
      </item>
      <item>
        <attribute name="label" translatable="yes">_Preferences</attribute>
        <attribute name="action">app.preferences</attribute>
      </item>
    </section>
    <section>
      <item>
        <attribute name="label" translatable="yes">_Quit</attribute>
        <attribute name="action">app.quit</attribute>
      </item>
    </section>
  </menu>
</interface>
To make this menu item do something, we create a property action for the
visible property of the lines label, and add it to the actions of the
window. The effect of this is that the visibility of the label gets toggled
every time the action is activated.
Since we want both labels to appear and disappear together, we bind
the visible property of the lines_label widget to the same property
of the lines widget.
...

static void
example_app_window_init (ExampleAppWindow *win)
{
  ...

  action = (GAction*) g_property_action_new ("show-lines", win->lines, "visible");
  g_action_map_add_action (G_ACTION_MAP (win), action);
  g_object_unref (action);

  g_object_bind_property (win->lines, "visible",
                          win->lines_label, "visible",
                          G_BINDING_DEFAULT);
}

...
We also need a function that counts the lines of the currently active tab,
and updates the lines label. See the full source
if you are interested in the details.
This brings our example application to this appearance: